Step 1: layout, excavation, and base
Nothing about stamping matters if the slab beneath it moves. So the process starts underground.
We mark the layout, then excavate to competent subgrade, removing topsoil, roots, and any loose fill that will not support a slab. Crushed stone aggregate goes back in and gets compacted in lifts rather than dumped and rolled once, because a base compacted in one thick layer is only compacted at the top.
Forms go in next, squared, staked, and set to the drainage grade so the finished surface sheds water where we want it. On a patio, that is usually a quarter inch per foot away from the house.
Step 2: reinforcement
A rebar grid is tied and set on chairs so the steel sits inside the slab rather than beneath it. Steel positioned in the lower third of the slab section takes the tension that develops every time the slab flexes. Steel lying on the subgrade takes nothing.
Fiber mesh may go into the mix as well, which helps control plastic shrinkage cracking during curing, but it complements steel rather than replacing it. The full specification we use is set out in our stamped concrete service description.
Step 3: pour, integral color, and finishing
The truck arrives with a 4,000 PSI mix carrying integral color, so the pigment runs through the whole slab rather than sitting on the surface. Concrete is placed, screeded to the forms, then bull-floated to bring paste to the surface and close it up.
Edges get tooled, and then the waiting begins. The slab has to lose enough bleed water and stiffen to the point where it will hold a deep impression without the mats sinking. On a hot, windy day in July this happens fast. On a mild September afternoon it takes considerably longer.
There is no clock for this. It is judged by hand, by pressing into the surface and reading how it responds.
The reason experience matters here
The stamping window is minutes wide and it moves with temperature, humidity, wind, and the specific load in the truck. Someone who has read that window thousands of times has to be standing on the slab when it opens.
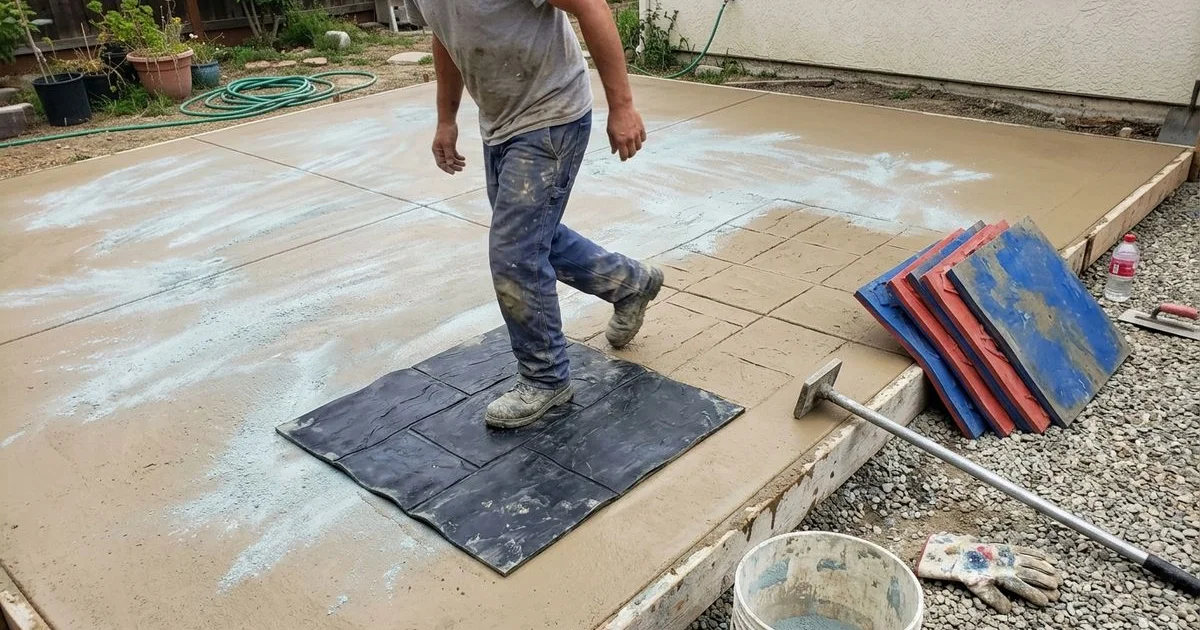
Step 4: release and stamping
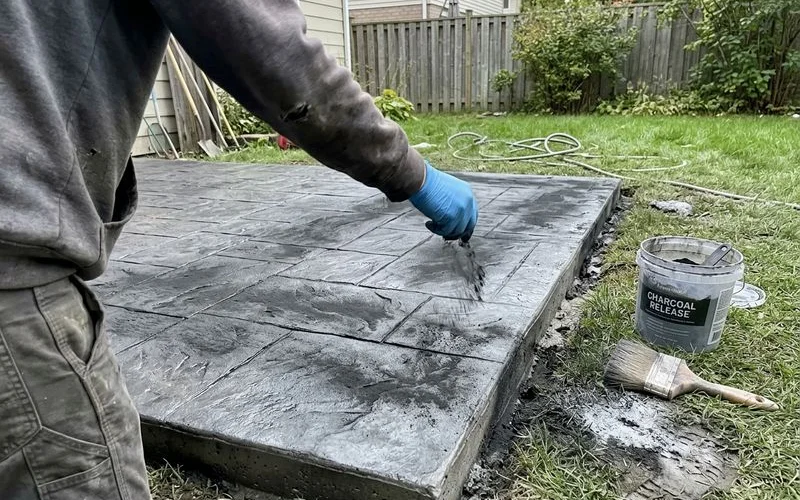
Antiquing release goes down just before the mats. Powder release does two jobs: it prevents the mats bonding to the wet concrete, and it deposits a secondary color that settles into the texture’s low points, producing the tonal depth that makes stamped work read as stone.
Mats are laid in sequence, pressed in, tamped, lifted, and repositioned across the slab. The pattern gets broken up deliberately so it does not repeat visibly. Then comes the detail work: touching up grout lines, working corners and edges by hand, and correcting any spot where a mat did not seat cleanly.
This is the part of the job that separates a convincing stone finish from an obvious concrete imitation, and it is entirely hand work.
Step 5: wash-off and joint cutting
Once the slab has set enough to walk on, excess release is washed off. How much gets removed determines how much tonal contrast remains, so this is a judgment call rather than a cleaning task.
Control joints are then saw-cut on a spacing suited to the slab dimensions, laid out to follow the stamp pattern so they read as grout lines rather than as cracks. Expansion joints go wherever the slab meets the house, steps, or another slab.
Step 6: curing, then sealing
The slab cures. Concrete gains strength through hydration rather than drying, so a curing membrane or damp-cure regime protects that reaction during the first days. You can typically walk on the surface at 24 to 48 hours, though the finish is not complete until sealed.
Sealing happens once the slab has cured sufficiently and conditions are right: dry surface, dry forecast, sensible temperature. Two thin coats of a high-solids solvent acrylic, with a slip-resistant additive wherever the surface gets wet, beat one heavy coat every time.
For the full timeline of what you can do and when, see how long concrete takes to cure.
What the sequence looks like on a calendar
| Stage | Typical duration |
|---|---|
| Excavation, base, forms | 1-2 days |
| Steel and final prep | 0.5-1 day |
| Pour, color, stamp | 1 day |
| Wash-off and joint cutting | 1 day |
| Cure before sealing | Several weeks |
| Sealing | 1 day |
Most of the elapsed time is waiting for concrete to do what concrete does. Most of the skill is concentrated in about four hours on a single afternoon.